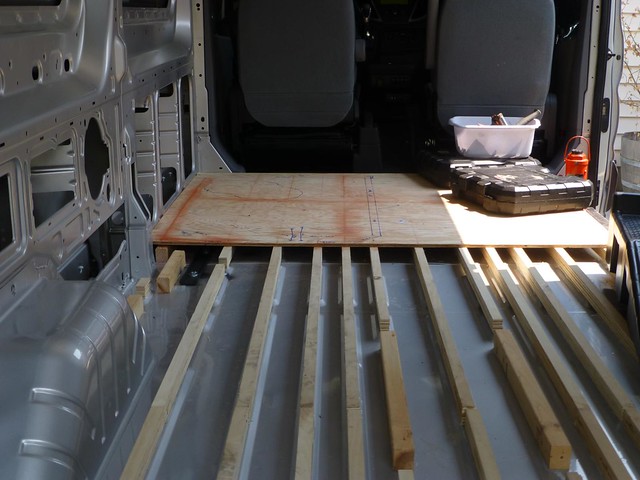
Added the second layer of floor insulation, and foamed the gaps.
Then cut the excess foam.
Cut the clearances in the floor ply for the propane line access, marked where the joists are, so that I can screw things up.
Lay down the Reflectix.
Lay down and screw the floor. It's not what it sounds like.
Rinse and repeat.
There's about a 1' section at the rear and end trim to do. Also, I'm going to foam some gaps, and add Reflectix to the wheel wells. That work will wait for a cooler day. I begin to fear that day will never come.
Friday, July 31, 2015
Sunday, July 26, 2015
Insulating more floor
The propane lines have been pressure tested. Finding no leaks, I had the tank flushed and filled. I don't have the cooktop installed yet, so I can't claim that we're cooking with gas :)
Also, I decided that the H2O runs will all be above the floor. With the tanks now planned to be almost directly above the rear wheels, and with the fresh tank much closer to the H2O heater than in the original layout, it will be straightforward to route the lines without interfering with other stuff.
So now it's time to finish up the floor.
First step is to glue down rigid foam between the van's metal floor ribs. Note that since the metal ribs have tapered sides, the foam doesn't touch the wooden floor joists. We'll add expanding spray foam in the gaps:
The well dressed floor insulator always adheres to this dress code:
Filling in all the little spaces:
Sniffing spray contact cement makes me feel verrry happppiey:
They don't lie about expanding foam:
After cutting the excess foam with a scraper blade on my multi-purpose tool, we're ready to put down the second layer of rigid insulation.
But, with all that crawling and bending to cut the foam, my back and knees ache. Besides it started raining and I need to experience this rare event.
So, putting in next layer is put off for a bit.
Saturday, July 18, 2015
Installing LPG lines
The LPG line feeds into the van in between the tank's rear mounting assembly and the spring mount.
I punched a 1.125" hole in the van floor, This is large enough to feed a 1/2" black pipe nipple and a rubber grommet.
The nipple goes to a T, which will feed the appliance runs.
There are 3 gas powered appliances, the H2O heater, the furnace, and the cooktop. The H2O heater will be to the left (van rear) of the elbow. The furnace will be forward of the wall frame member shown above. The cooktop will be on the passenger side of Annie, On the counter near the sliding door.
I cut the joists to run the line to the cooktop, cut a length of pipe to fit across Annie, and tried to thread it.
Unfortunately, my ancient 1/2" die's threads were munged, and I couldn't get it to bite into the pipe. So, I took a trip to the not-so-local big box, and had them cut and thread a length. Took the "plumbing expert" 2 goofed/wasted lengths before he managed to cut a proper thread.
I installed the cooktop pipe, and its cut-off valve. The pipe is strapped to pieces of ply which are VHB'd to Annie's floor.
I then installed the feeds to the heaters.
All the appliances will be fed with high pressure flared LPG rubber hose. I'll install the flare adapters when I'm ready to install the appliances. Don't want to ding the flares while doing other stuff. In the meanwhile, temporary plugs will help keep dirt out of the lines.
All the joints will be accessible by easily removable hatches under the cabinetry. The floor under and around the pipes will be insulated with expanding foam. Only the feed-through and the 2 elbows for the cooktop feed will be below my flooring. They will have access hatches as well.
Next, I installed the line from the LPG tank to the feed-through. I had earlier attached the line to the regulator assembly.
Next steps will be pressure test, flush and fill the LPG tank. Then do the water runs and resume floor insulation.
Tuesday, July 14, 2015
Tweaking the layout
We've decided to change some of the layout in order to provide better mounting and exhaust locations for the furnace and water heater. We also decided to put the gray water tank inside, instead of below the floor. We are moving the gray and fresh H2O tanks in between the wheel wells, almost directly above the axle. We'll lose a bit of hard-to-reach space by putting the gray H2O above the floor, but it improves the weight distribution, and centralizes/simplifies the plumbing and propane runs. We're moving the battery slide to have access via the rear doors. The solar controller, MS2012, and breaker/fuse box will actually have a shorter run to the batteries. This should also be at an easier location to run power lines around Annie, and opens up a better place to feed the propane line up through the floor and into the driver side appliances.
Thursday, July 9, 2015
Begin floor
Starting on the forward-most section.
First layout where the bathroom will go.
Next we insulate the floor in between the joists. A layer of 1" rigid foam (the pink stuff) and 1/2" of aluminum backed rigid foam. There is expanding foam filling any gaps. Each foam board is glued down with 3m 90 spray contact cement.
then cover it with Reflectix
The floor is screwed down on top of the Reflectix
Here's the bathless bathroom's layout
We've taken a closer look, and we think we can move the left-hand wall to the right about 3" and still have enough floor space to maneuver. That will give us a bit more clothes closet/storage space aft of the fridge.
Friday, July 3, 2015
Mawnings Spent Installing an Awning...Part 2
I tracked the awning clanks and rattles down. The problem is one of generally loose/sloppy clearances in the awning design.
There were 2 main issues.
1. The awning mounts are not tightly contoured to snugly fit the awning. The awning is fastened to its mounts by two small sheet metal screws at the base of each mount. Even with those screws, the awning can wiggle around quite a bit. This allowed the awning to loudly bounce against the mounts on a rough road. I added a bunch of silicon seal to the wiggly space. This largely eliminated the clanking.
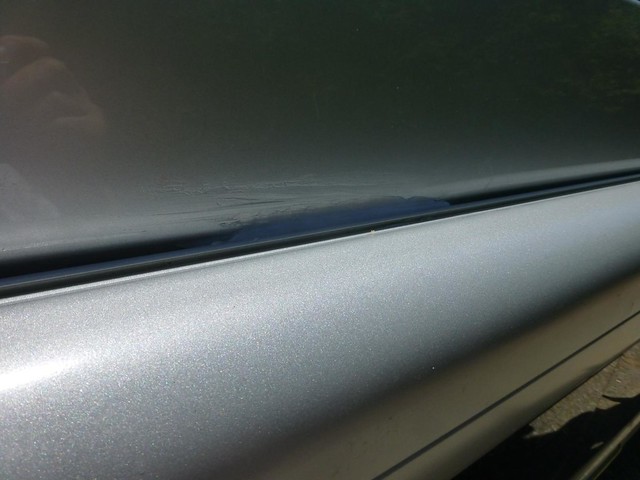
2. The awning has two light weight, fairly flexible support legs that are stowed in the awning's lead rail. Even when stored per instructions, they are free to rattle around in the rail. I added a bunch of pads (cut from the furry side of some industrial adhesive mount velcro). This really helps stop movement, and if the legs do shake against the lead rail surfaces, the pads damp the noise.
Some pics of the padding:
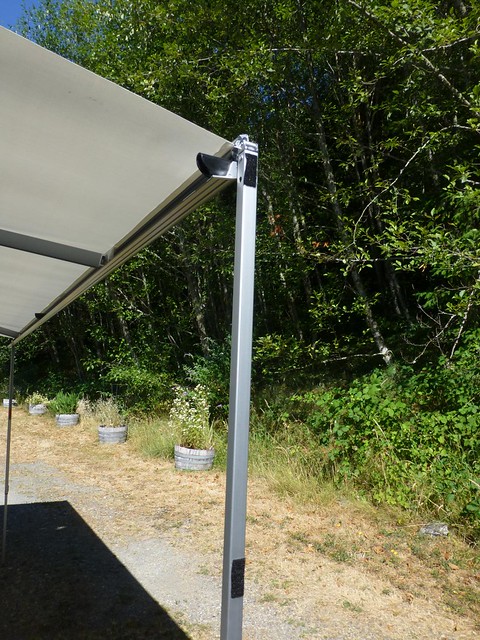
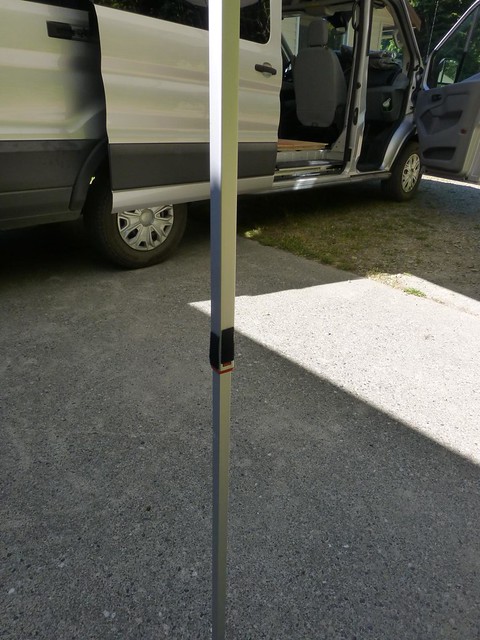
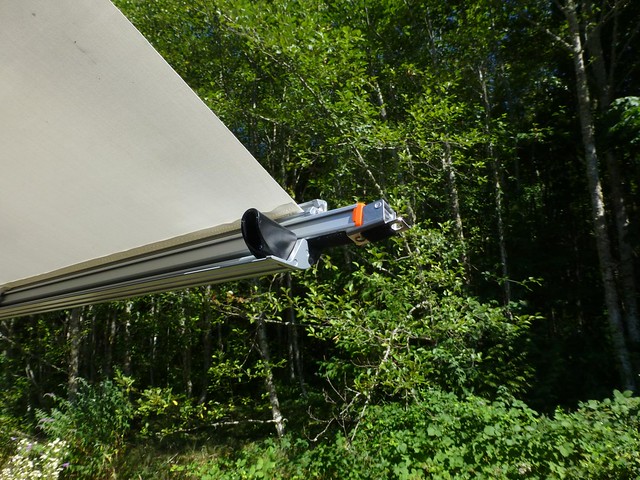
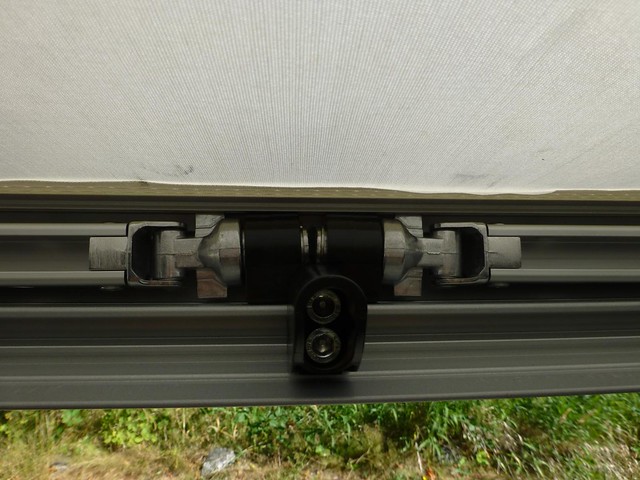 cushion added where stored arms butt
I was also a bit surprised that the fabric has a seam down the middle.
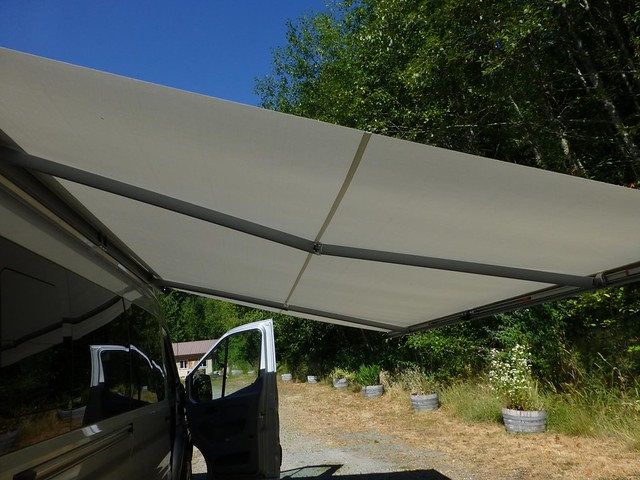
This seam does not show up on any of the Carefree site's awning pictures that I found. Also, we had a larger acrylic awning on a Class C that we had some years back. It had no seam. Hopefully, this will not become a maintenance/wear problem down the road.
Generally speaking, I'm a bit disappointed in the quality of the awning. It should be serviceable, but it's definitely flimsier than I'd like to see on an item subject to constant shaking.
Since I found no other viable product, and given Annie's restrictions on mount locations, I'd still buy this again. But if someone doesn't have the same solar panel or awning material driven constraints, I would suggest looking at other brands.
This pretty much concludes installing the major externally mounted items, with the possible exception of the gray water tank (location TBD). The next steps will be to identify exactly where all the internal stuff will go, in order to plan out plumbing, gas, and electric runs, then to start insulation (along with installing any runs embedded in insulated areas).
So, there will probably be a bit of silence here until I've got some pretty pictures
Mawnings Spent Installing an Awning...Part 1
It's been really toasty here, so we've only been working mawnings
The installion almost didn't happen at all. We ordered a Carefree Freedom wall mount awning through an on-line dealer. It was about 10 days between my order placement and the delivery. The unit was drop-shipped from Carefree.
Carefree packaging was inadequate to protect against the shipper they chose. The awning's box arrived in this condition:
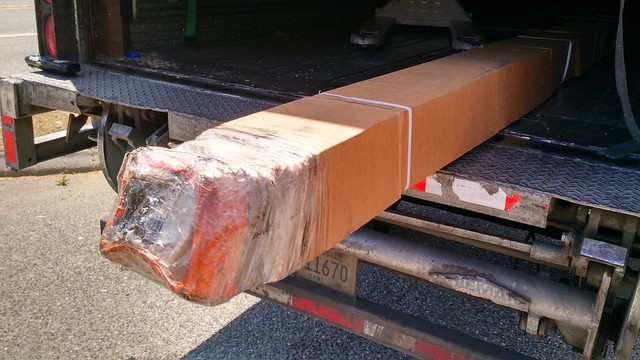
Someone evidently tried to stop the box from bleeding out by wrapping the poor thing in shrink wrap. Maybe it was the murderer trying to hide the evidence.
It was too late. The awning was DOA on arrival:
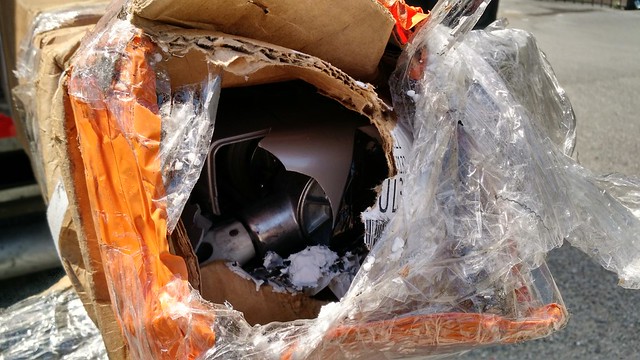
I refused shipment, and the dealer immediately started the process of getting a replacement. Very friendly, cooperative folks at the dealer!
About 10 days after the awning was re-ordered, the replacement showed up (via another carrier and with Fragile stickers on the box). Evidently, the Fragile stickers did their job. The box was damaged very much like the first one, but not so badly that the awning was crunched. We opened the box ends at the loading dock to be sure.
Got the box home, and discovered that whoever packed it cleverly left out the mount brackets, hardware, and crank handle. (This is a manual opening awning). They did generously include a redundant pair of leg support latches (in black...). The awning is silver, and so was the other set of the leg supports.
I called customer support. They said that this problem also just happened to someone else. They also said they'd ship out the missing stuff right away. Actually shipped about 2 or 3 days later, by UPS Ground. So, the awning just sat around for another week.
The package arrived this past Friday. It did have the mounting brackets and HW, but not the crank handle.
Had to recall customer service, and got the crank handle shipped "overnight". It showed up Tuesday. SO, I am less than whelmed with the competency of Carefree's picking/packaging/shipping decisions. If, as I suspect, this happens regularly, there is a real problem with management in those areas. I should be clear that I have no complaints about the Carefree customer service folks I talked with. They were uniformly friendly, and seemed to want to get this all resolved.
Well, I finally got the awning and parts kit, so now we can talk about the install.
I decided on the Carefree wall mount for a few reasons:
- My solar panels don't provide enough space for a roof mount unit or brackets.
- The Fiamma units only seem to be available with vinyl fabric. I wanted acrylic
- I couldn't find anyone selling manually operated Fiammas.
- Fiamma had a longer delivery lead time than Carefree. (Although as things turned out, Carefree took about as long to get something functional/installable out here.)
I'll talk about getting the awning mounted here. In Part 2 I'll talk about what I had to do to get the thing to stop rattling. I need to take a few pics for that, and it's too **** $%@%#^&$(&*^* HOT to do that now.
We chose a 4M long awning to cover the passenger side from just forward of the slide to just about aft of the rear window. The problem is that Annie's front slopes down and gets narrower, starting over the sliding door.
The vertical slope was easy to measure with a snap line.
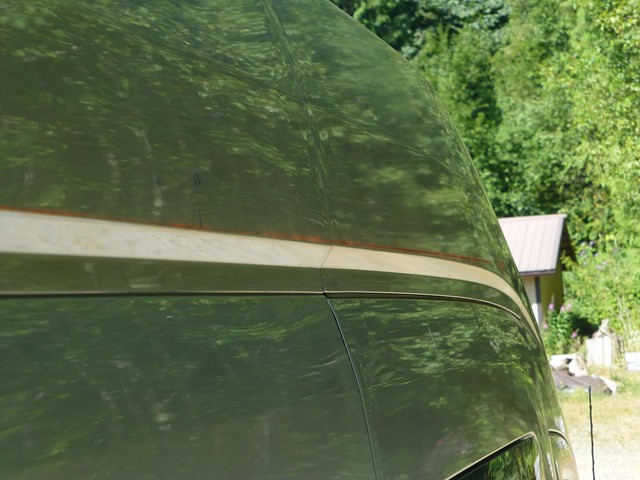
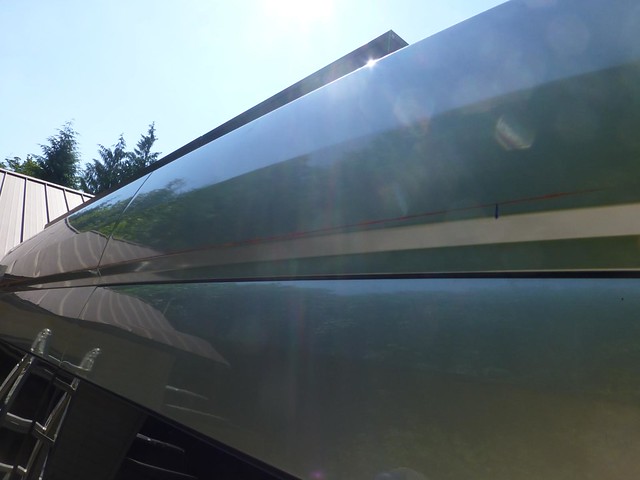
So, it was easy enough, following Carefree's instructions, to locate where the mounting brackets needed to go.
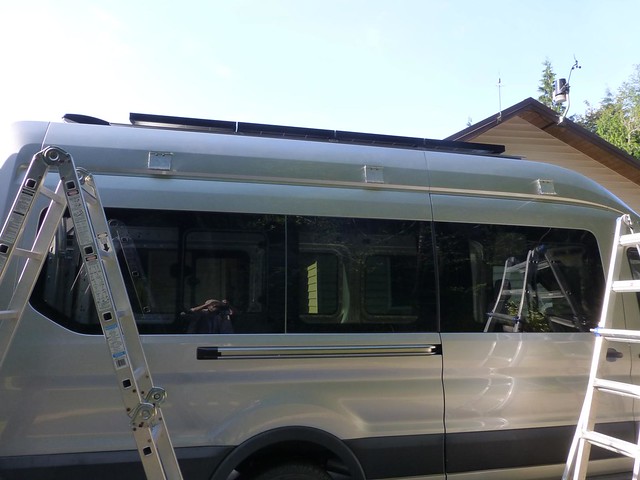
Then hang the awning on the rear 2 brackets.
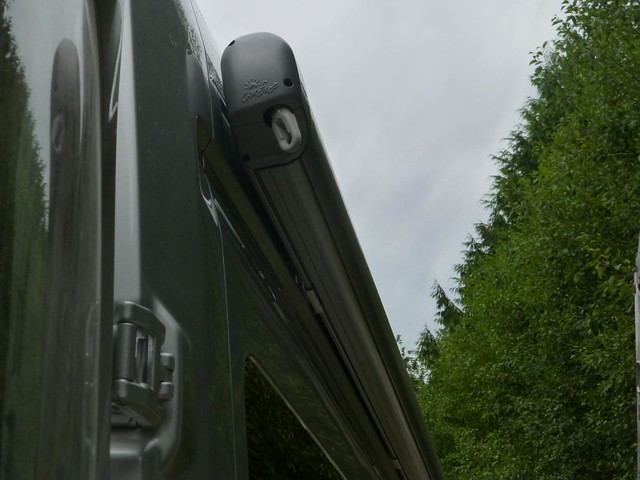
Each bracket has 2 mounting holes. I made some 3/4" ply backer plates. I made 'em as long as possible to fit into the space between Annie's inner wall frame and her skin. The brackets also are just about as wide as the flat(ish) wall panel area where the brackets mount.. They are VHB'd to the outer wall.
The rear two brackets line up very close to Annie's wall braces (that connect the inner and outer walls). That means there is little to no flex to the outer wall's sheet metal, even when the awning is fully extended.
Not so lucky with the front bracket.
Because the front of Annie narrows, the front bracket needs to be shimmed. Turns out that it needs about 1/2". I used 2 thicknesses of 1/4" aluminum flat stock, cut to size, drilled and VHB'd together and to the bracket.
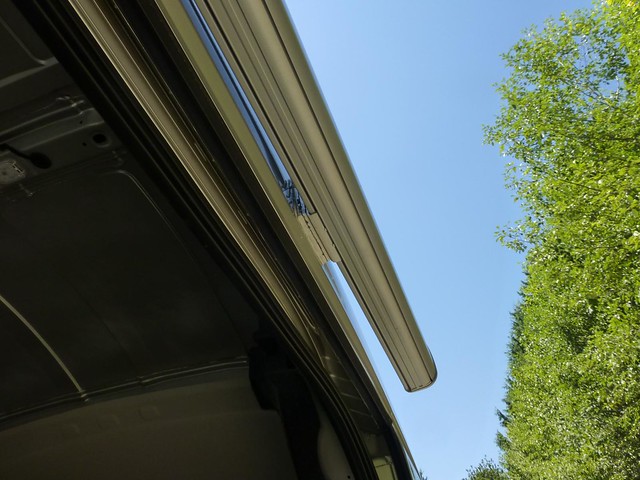
The front bracket also falls far from any internal wall supports, so I made up an wooden internal brace that sandwiches snugly (unloaded) between the 2 walls. This way the awning torque force is transferred to the very strong interior wall.
I took Annie out for a spin, and the mounting seemed stable. However, there was a heck of a lot of rattling coming from the awning itself, especially as I drove on rutted dirt roads. I think I've got that mostly handled now, and that'll be the topic of part 2.
Installing the propane tank
Over the last few days, we installed the propane tank.
It's a Manchester 30# unit, about 10" diameter and 32"length.
The tank comes with 2 mounting flanges, adjustable in height.
We are mounting it on the driver's side, roughly working aft from the forward pop-out window.
Of course, the tank doesn't line up with anything particular on Annie, but there are 2 transverse members just forward of the rear wheel's spring mount.
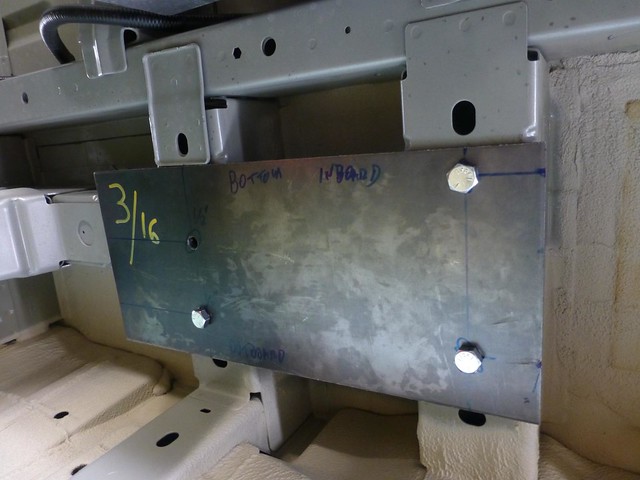
So I made a mounting plate that ties into the transverse members, with a hole located for the tank's rear mounting flange. In this pic, looking left is looking toward the rear
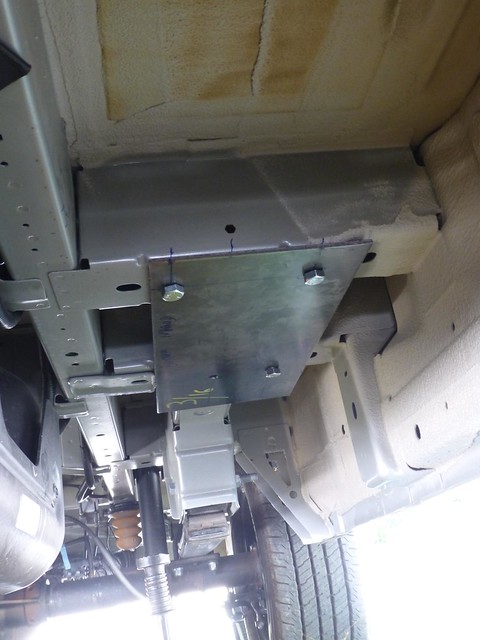
This is where the hole for the forward tank bracket will be drilled
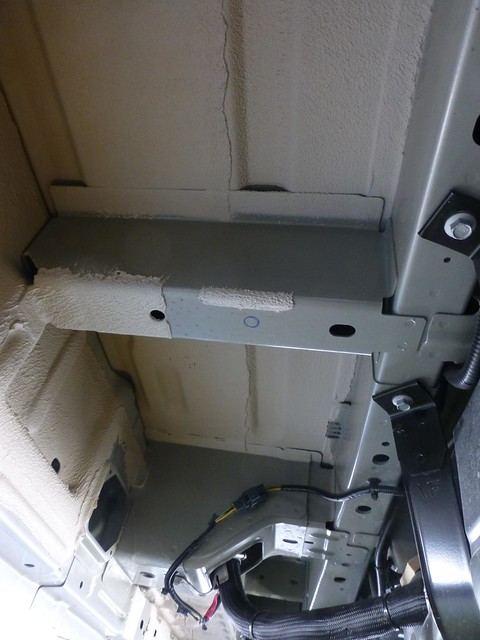
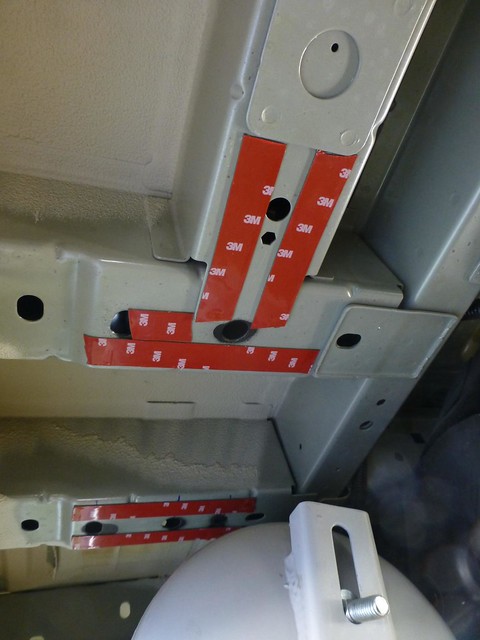
All the holes into Annie are located, drilled and painted. I'm using 1/2" bolts running through existing holes in the transverse members (for the rear mounting plate) and with a new hole for the forward tank bracket.

The mounting plate will also be held by VHB tape.
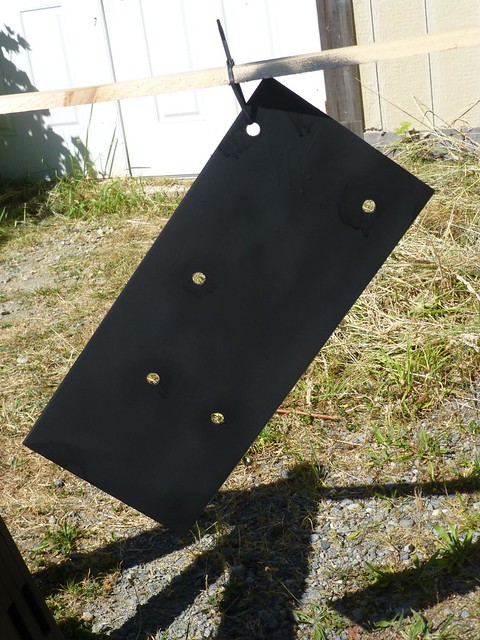
The mounting plate is primed and painted. I've also located and drilled the tank bracket hole.
Lifting the tank into position
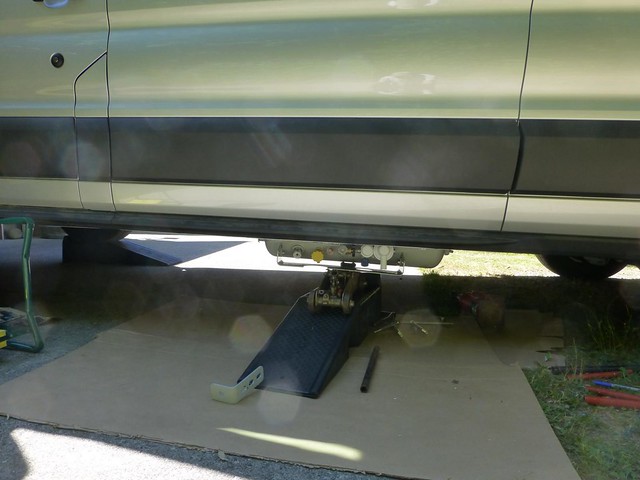
Tank is mounted.
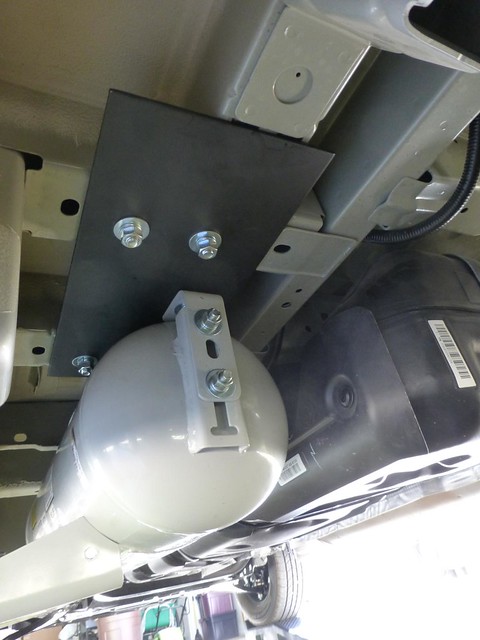
And looks thus.
The actual LPG tank is an inch or so below the ground clearance of the fuel tank, but the skid plate is a couple of inches lower than that. We'll see if clearance is an issue, Clarence.
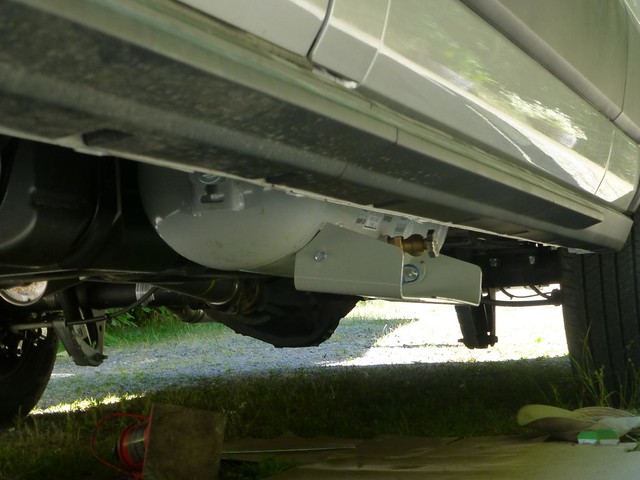
I painted all the bolts and nuts, and took Annie for a drive on some badly rutted/washboarded logging roads. Nothing fell off or came loose. This is probably a good thing.
I will be running the LPG plumbing once I have a clearer sense of the inside floor layout.
Next step will be installing the awning. Just getting the awning was an "interesting" experience, which I'll describe better once the work starts
It's a Manchester 30# unit, about 10" diameter and 32"length.
The tank comes with 2 mounting flanges, adjustable in height.
We are mounting it on the driver's side, roughly working aft from the forward pop-out window.
Of course, the tank doesn't line up with anything particular on Annie, but there are 2 transverse members just forward of the rear wheel's spring mount.
So I made a mounting plate that ties into the transverse members, with a hole located for the tank's rear mounting flange. In this pic, looking left is looking toward the rear


This is where the hole for the forward tank bracket will be drilled

All the holes into Annie are located, drilled and painted. I'm using 1/2" bolts running through existing holes in the transverse members (for the rear mounting plate) and with a new hole for the forward tank bracket.

The mounting plate will also be held by VHB tape.

The mounting plate is primed and painted. I've also located and drilled the tank bracket hole.

Lifting the tank into position

Tank is mounted.

And looks thus.
The actual LPG tank is an inch or so below the ground clearance of the fuel tank, but the skid plate is a couple of inches lower than that. We'll see if clearance is an issue, Clarence.

I painted all the bolts and nuts, and took Annie for a drive on some badly rutted/washboarded logging roads. Nothing fell off or came loose.
I will be running the LPG plumbing once I have a clearer sense of the inside floor layout.
Next step will be installing the awning. Just getting the awning was an "interesting"
Subscribe to:
Posts (Atom)


